6 Pilates Moves That Feel Easy and Are Not
Quick Answer: Pilates exercises are designed around control rather than range or load, so the visible movement is often the smallest part of what is happening. Six of the most commonly rushed movements — pelvic curl, single leg stretch, the roll-up, side-lying leg lifts, swan prep, and standing footwork — are the ones where technique breaks down invisibly. In every case the fix is smaller range and slower tempo.
If a Pilates exercise feels easy, one of two things is true.
You are very good at it, or you are not doing it.
This is general information, not medical advice.

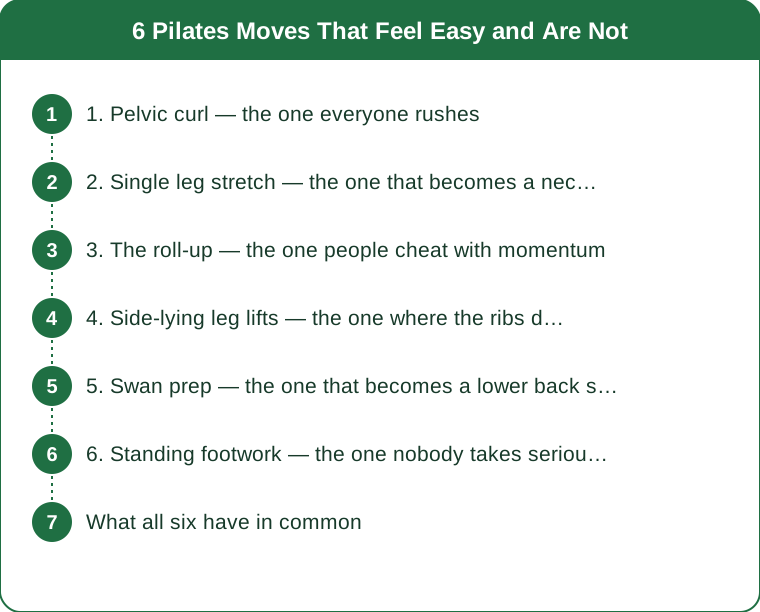
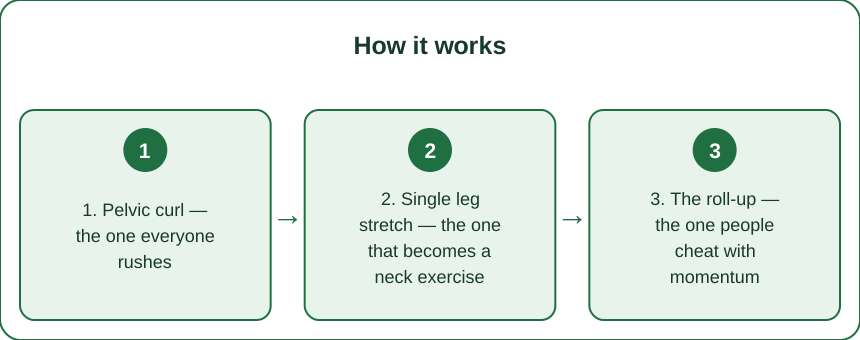
1. Pelvic curl — the one everyone rushes
What it looks like: lifting your hips off the mat and putting them down again.
What it is actually asking for: sequential articulation of the spine, one vertebra at a time, both up and down.
The pelvic curl is the first exercise in most mat classes and the most commonly performed as a single block. The hips lift, the whole back comes up as one rigid unit, and the hips come down. It looks correct from across the room and it trains almost nothing of what it is designed to train.
The point is the sequence. Tail bone first, then each segment of the lumbar spine, then lower thoracic — and on the way down, the reverse, placing each segment deliberately. It is a mobility and control exercise for the spine, not a glute exercise, although the glutes work.
How to tell if you are doing it: the movement should take considerably longer than feels natural — think four to six seconds up and the same down. If you can lift and lower in two seconds, you are moving as a block.
What to change: halve the height. A smaller curl performed with genuine articulation is worth far more than a full bridge performed rigidly. Most people need to lift only to the lower back before the sequencing breaks down, and stopping there is correct.
2. Single leg stretch — the one that becomes a neck exercise
What it looks like: pulling one knee in while the other leg extends, alternating.
What it is actually asking for: a stable pelvis and a deeply engaged deep abdominal wall while the limbs move independently of the trunk.
The most common failure is that the exercise migrates upward. The head lifts higher, the neck strains, the shoulders creep toward the ears, and the abdominal work quietly disappears. Within thirty seconds it has become a neck-holding exercise with legs moving.
The second most common failure is the pelvis rocking side to side with each leg change. Any rocking means the trunk is being moved by the legs rather than holding against them, which is the opposite of the intention.
How to tell if you are doing it: put a hand under your lower back for one repetition. If the pressure changes as the legs alternate, the pelvis is moving. It should be still.
What to change: keep the extending leg higher. Lowering the leg toward the floor increases the demand substantially, and most people extend far lower than they can control. Raise the working leg to forty-five degrees or higher, keep the head down on the mat entirely if the neck is the limiting factor, and rebuild from there.
3. The roll-up — the one people cheat with momentum
What it looks like: rolling up to sitting and rolling back down.
What it is actually asking for: controlled, segmental flexion of the spine against gravity, with no momentum whatsoever.
The roll-up is one of the most honest exercises in the repertoire, which is why it is so often modified without acknowledgement. The classic cheats are throwing the arms forward, using a breath-driven bounce at the start, and gripping the hip flexors to drag the trunk up.
A useful diagnostic: stop halfway. If you can pause at the point where your shoulder blades leave the mat, hold for two seconds, and continue, you are moving with control. If stopping causes you to drop back down, you were using momentum.
The descent is the more valuable half and the one people rush. Lowering slowly, segment by segment, is where the strength is built.
What to change: bend the knees. A roll-up with bent knees and feet flat reduces the hip flexor contribution and lets the abdominals do the work. Alternatively, work only on the descent — start seated, roll down as slowly as possible, and return however you like. Building the lowering phase first is a well-established route to the full movement.
4. Side-lying leg lifts — the one where the ribs do the work
What it looks like: lying on your side and lifting the top leg.
What it is actually asking for: hip abduction with a completely stable trunk, in a body position that provides no support at all.
This is where compensation is most visible to a teacher and least visible to the person doing it. What typically happens: the trunk collapses toward the mat, the waist sinks, the pelvis rolls backward, and the leg lifts through a combination of hip hitching and rolling rather than genuine abduction.
The result is an exercise that feels moderately effortful in entirely the wrong places.
How to tell if you are doing it: the range should be small. Genuine hip abduction with a stable pelvis is limited — somewhere around forty-five degrees at most for many people, and often much less. If your leg is going considerably higher than that, the pelvis is tilting to allow it.
What to change: lift the waist off the mat. Actively create a small gap between your ribs and the floor and maintain it throughout — this is the cue that transforms the exercise. Then lower the leg height until you can keep that gap. Most people find the working range drops dramatically and the exercise becomes noticeably harder.
5. Swan prep — the one that becomes a lower back squeeze
What it looks like: lifting the chest off the mat from a face-down position.
What it is actually asking for: extension distributed through the thoracic spine, with the shoulder blades organized and the lower back protected.
The common error is that all the extension happens in the lumbar spine — the lower back crunches, the chest gets high, and the upper back stays flat. It feels like a big movement and it concentrates load in the one region the exercise is meant to spare.
The second error is the shoulders. Hands push hard into the mat, shoulders rise toward the ears, and the neck compresses.
How to tell if you are doing it: you should feel it across the upper back and between the shoulder blades, not as a pinch in the lower back. Any pinching sensation means the movement has gone where it should not.
What to change: take the hands off the mat entirely. Lift only from the strength of the back extensors, and the height will drop substantially — which is the point. Keep the pubic bone in contact with the mat, lengthen forward through the crown of the head as you lift, and think of the movement as long rather than high.
If you have any history of lower back problems, this is one to discuss with a teacher or physiotherapist rather than self-correcting.
6. Standing footwork — the one nobody takes seriously
What it looks like: rising onto the balls of the feet and lowering.
What it is actually asking for: control through the ankle and foot, alignment through the whole leg, and a stable trunk without any external support.
Standing footwork is usually treated as a warm-up or a filler, which is why it is the least well-executed movement in most classes. Ankles roll outward, weight shifts to the outside of the foot, knees drift, and the descent is a controlled fall.
The foot and ankle receive very little dedicated training in most people’s week, and they are the foundation for everything done standing. This exercise is one of the few that addresses them directly.
How to tell if you are doing it: look down at the descent. If your heels drop faster than they rose, you are not controlling the movement. If your weight rolls to the little-toe side as you rise, the ankle is not tracking.
What to change: slow the lowering to twice the time of the rising. Keep the weight distributed across the base of the big toe, the base of the little toe, and centred through the heel. Do fewer repetitions with control rather than many with none — ten well-executed rises are worth more than thirty rushed ones.
And a bonus test: try it with your eyes closed. Balance demands rise sharply, and it reveals immediately how much you were relying on visual correction.
What all six have in common
The pattern is consistent enough to be a general rule for Pilates: the fix is always smaller and slower.
Every one of these exercises fails in the same way — range is borrowed from somewhere that should be still, and tempo is fast enough to hide it. Every one is fixed the same way, by reducing the range until the borrowing stops and slowing down until the control is genuine.
This is what makes Pilates difficult to self-assess. In most forms of training, a harder version is bigger, heavier, or faster. Here, the harder version is frequently smaller, and looks less impressive to anyone watching.
A practical approach for any Pilates exercise you suspect you are doing badly:
- Halve the range. If it gets harder, you were compensating. If it gets easier, you were probably fine.
- Double the time. Momentum hides more errors than anything else.
- Add a pause at the hardest point. Two seconds of stillness where you would normally pass through is the fastest diagnostic there is.
- Put a hand somewhere that should not move. Lower back, ribs, opposite hip — direct feedback beats guessing.
Is it worth having a teacher check?
A single session with a qualified teacher watching typically catches more than months of self-correction, because these errors are specifically the ones that feel fine from the inside.
FAQ: Pilates Technique Questions, Answered
How do I know if I am engaging the right muscles? The most reliable signal is where you feel fatigue afterwards. Neck, lower back, or hip flexors dominating usually indicates compensation rather than engagement.
Should Pilates ever feel like hard work? Yes, and the effort should be concentrated and controlled rather than breathless. Struggling and shaking during a small movement is normal; straining and losing form is not.
Is it better to do fewer repetitions? Generally, yes. Classical Pilates repetition counts are low deliberately, because the exercises are designed to be done well rather than many times.
Why does my neck always hurt in mat work? Usually the head is being held up by the neck rather than supported by abdominal engagement. Keeping the head down on the mat until the abdominal work is established is a legitimate and commonly taught progression.
TL;DR:
- Pelvic curl: articulate segment by segment, halve the height, take four to six seconds each way.
- Single leg stretch: keep the extending leg high and the pelvis completely still.
- Roll-up: no momentum — test it by pausing halfway, and build the descent first.
- Side-lying leg lifts: lift the waist off the mat and reduce leg height dramatically.
- Swan prep: hands off the mat, extension through the upper back, no lower back pinch.
- Standing footwork: lower twice as slowly as you rise, and try it with eyes closed.
- Universal rule: halve the range, double the time, and add a pause.
The exercises that look easiest are the ones where compensation is invisible. Smaller and slower is almost always the harder version.
This is general information, not medical advice. Work with a qualified teacher if you have any injury history or persistent pain.
See It in Motion
Seen here: Racerback Tank Top - White — shop similar styles on bubblelime.com
Keep Reading
This article is for general informational and styling purposes only. Fit, sizing, and product availability may vary.